Although outdoor temperatures can begin to drop, people generally count on warmer temperatures at home. It is why it’s more difficult when winter can sneak in and create problems. One of the most frustrating issues occurs when pipes in your plumbing system get frozen. Problems with frozen pipes are anything from a nuisance to an expensive, widespread mess.
A lot of people choose to call their plumber for frozen pipes. That’s always a good idea. You can also try thawing pipes using just the items you have in your home. To help you solve this frustrating plumbing issue, here’s a step-by-step guide to defrost frozen pipes.
Step 1: Locate the Frozen Pipes
The very first and most challenging task is to find the pipes that are frozen. The lines themselves might not be visible until the ice completely covers them. Switching on all the faucets can help you pinpoint possible areas. If one tap isn’t functioning, you can hopefully follow the particular plumbing lines to get to the frozen pipes.
It would help if you ran your hands through the piping instead until you felt a sharp drop in warmth. When you’ve identified the area the areas where the plumbing is coldest, you’ve probably discovered frozen pipes.
This technique won’t work if every faucet isn’t functioning. You’ll need to inspect your primary line of water now because it’s where the water supply to your home. Each plumbing line will eventually lead back to the main water line. They typically reside in the basement or crawlspace. If neither of those things is present in your home, examine the garage or the area immediately surrounding the heater for standing water. The main line is often on the opposite side of your home’s an outside wall, so if you’re still having difficulties finding it, look there.
Step 2: Drain Your Plumbing System
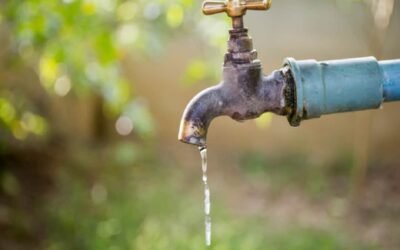
Suppose you are sure the pipes are frozen and shut off the water from the primary source. It is impossible to thaw pipes with cold water that is ice cold on the inside. Therefore you’ll need to turn off every faucet if you don’t have one. It will flush the remaining water out of the plumbing. Washing toilets is also necessary.
The time to start the thawing process is when the plumbing runs dry of water. Make sure to gather a few items before starting:
- A Heat Source: It could be an electric hair dryer, lamp, heating pad, or even an unheated bucket.
- A Few Towels or Clean Cloths: Rags and towels are a great way to help heat transfer onto frozen pipes. If the pipe has burst, they could aid in cleaning up.
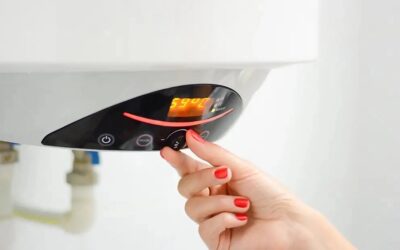
Step 3: Apply the Slow, Even Heat
Don’t heat your pipes too quickly since it could damage the plumbing. It makes the process more gradual and even. Based on the source of heat, focus only on areas around the frozen region. Try heating the pipes closest to the closest faucet for the bathroom or kitchen. Water or steam produced as a result of heating moves in that direction.
Heating one portion at a time as you gently make your way through the pipe. Sure, homeowners increase their thermostats and use the warm air to melt all tubes at once evenly. If it’s performed slowly, it won’t cause any problems. With luck, you’ll have successfully defrosted the lines that froze. However, there is still one more thing to do.
Step 4: Restart the Water Main and Check for Leaks
Reconnect to the water main. Unlock the supply line, however, only a tiny amount. It will allow enough water to look for leaks without leaving a dirty mess. They should shut off the water supply in case of a leak because they are easily detectable. In this situation, hiring a plumber is often advised. They’ll have the equipment and know-how to fix the issue, which includes replacing the damaged pipes.
If there’s no leak, you can start the main water line for the remainder of the time before reaching all faucets.
How Can Frozen Pipes Be Avoided?
The most effective method to defrost frozen pipes in winter is to stop them from icing. The lines nearest to lengths without heat or those outside your home are most at risk. Other lines are less likely to freeze since they are frequently found near insulation or in the spaces between your home’s floors, where it is warmer and less frigid.
Here are some tips you able to do to reduce the chance of freezing pipes:
1: Maintain your home’s temperature above 55 degrees. You’ll prefer warmer temperatures, but 55 degrees or higher is an ideal standard to follow even if you’re not home.
2: Use insulation wrap and electrical pipe heat tape to insulate your pipes. These materials ensure that lines are heated, significantly lessening the likelihood of freezing them.
3: Make sure you keep a little water flowing through the plumbing. Water running through the plumbing is more challenging to freeze than standing water. You should make sure that you do this for every faucet as well. Your water bills should not rise.
4: Can open cabinets and other doors to ensure uniform heat distribution. Closed doors and cabinets can be pretty effective in keeping the heat out. Open them in frigid temperatures to keep warm air flowing around.
When you follow these guidelines and steps, you’ll stop pipes from freezing or have an easy method of melting them. If you would instead assign the task to a professional, contact your neighborhood plumbing service in Ottawa.
You can rely on the skilled and welcoming personnel at Ottawa Plumbing Service for any plumbing needs, whether primary or complex emergency repairs or the melting of frozen pipes. Call (613) 317-1682 to immediately speak with a trusted Ottawa plumber or email info@ottawaplumbingservice.com.